Review of my new Zombie Pumpkins tools!

My pumpkins!
A while back, I’m talking a couple years, I talked about Zombie Pumpkins on this very website. If you’re not familiar, Ryan Wickstrand owns the website Zombie Pumpkins, which features TONS of pumpkin patterns and other pumpkin related merchandise. His website is where I get my patterns from each year and this year I decided to up my game by ordering the Zombie Pumpkins carving knife and the Stick ‘n Carve paper. Today I am going to review those products. You can see en example of my work using the new tools to the left. I’d say they turned out pretty well! Keep reading for the rest of the review!
First off, I should mention that the patterns on Zombie Pumpkins are not free, aside from a very small handful of free patterns that fail in comparison to his real patterns. You can buy various membership packages that entitle you to a set amount of patterns to print off, but if you go for the full membership, Ryan donates some of the profit to charity. I usually opt for the option that allows me a fair number of patterns without going overboard. I am only one person after all!
Now some of you may be more traditionalists and you don’t like the idea of using existing patterns and would rather free hand. (cough cough my brother cough cough) That’s all well and good, but I can’t draw very well and I personally like making some of my pumpkins resemble familiar characters (Jack Skellington).

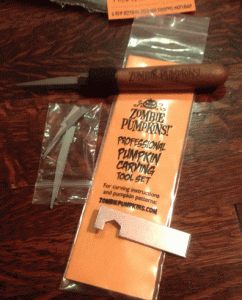
Zombie Pumpkins Pro Carving Tool
Either way, there are several annoying aspects to carving a pumpkin. The first would be using cheap plastic carving knives that you can purchase at any store this time of year. Those break. It’s a given. I go through many each year. They also really hurt your wrist after so many pumpkins. The Zombie Pumpkins knife has a solid wooden handle with a foam padding around part of it. It also has interchangeable blades and a wrench to change them with. The larger blades are great for big cuts, like the eyes in my Jack Skellington pumpkin. The smaller blades are great for small intricate cuts, like the ones on Oogie Boogie’s small eyes and his mouth and Jack’s teeth. After having gutted and carved three pumpkins in a row, I will admit my wrists did hurt, but not nearly to the extent that they used to with the cheap carving sets and the end result had much cleaner and precise lines.
Now maybe you don’t want to spend money on a fancy carving knife, although it’s not that expensive vs. buying a new plastic set every year. However, you can’t disagree with my next point. And I use the word point because everyone’s least favourite part of carving a pumpkin is actually poking the pattern with the pointy plastic tool that comes in those sets. Traditionally, you would print off your pattern and adhere it to your pumpkin using tape and then proceed to poke holes along the pattern lines with your pointy little tool created by Satan himself. Thanks to Stick ‘n Carve, that whole process can be skipped. You simply use any kind of printer to print your pattern directly onto the Stick ‘n Carve paper, peel off the backing and adhere the paper to your pumpkin. It’s way easier than it sounds. Even with some wrinkles, I found you could adjust the paper easily enough. Then you just carve right through the paper. It doesn’t even gunk up your knife with the paper. And when you are done, you either peel the paper off, or run it under some tap water, which will dissolve the paper.
All in all, a simple kitchen knife is fine if you want to make a boring pumpkin, but if you want to go all out insane like I do, get yourself these tools! At least the paper! I was skeptical at first and after having carved my pumpkins for this year, I have received nothing but compliments. Someone very familiar with my past pumpkins even said it was my best work yet!
As you can clearly see, I love Zombie Pumpkins, but since Ryan still has yet to make a Wednesday Addams stencil like I suggested he do years ago, I’ll have to say I’m highly disappointed in his designs! Ok, I’m just joking (slightly).
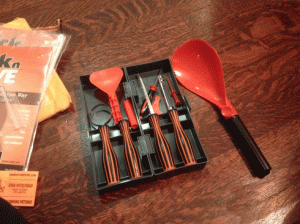
Below is a picture of a $10 pumpkin carving kit from Target. I haven’t tried it out yet, but it at least seems slightly more solid than the Pumpkin Master’s plastic kits that are everywhere. It also comes in its own case. I have added some of the small cheap plastic tools into this kit, just so they would all be in one place. The giant spoon is actually for gutting, as it has teeth on the edges. Hard to fit into most pumpkins, but helps on larger ones at first to remove the majority of the seeds. I mainly have this kit available for my siblings to use with their children, as I don’t trust anyone with my fancy ZP cutting knife! Go Ryan! As in, go make me my Wednesday stencil! Again, just kidding. (sort of).

Target carving kit in case and pumpkin gutter spoon.

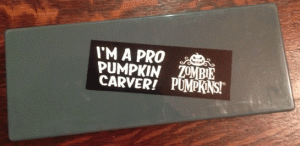
I took the ZP sticker that came with my order and stuck it on the Target case so people would either think I’m a master carver, or I’m flat out insane.
